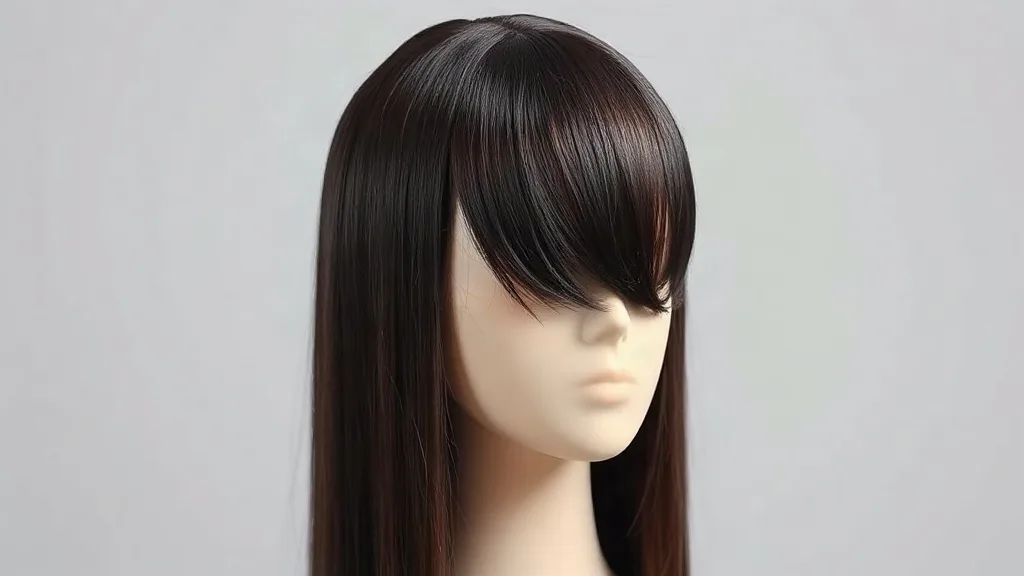
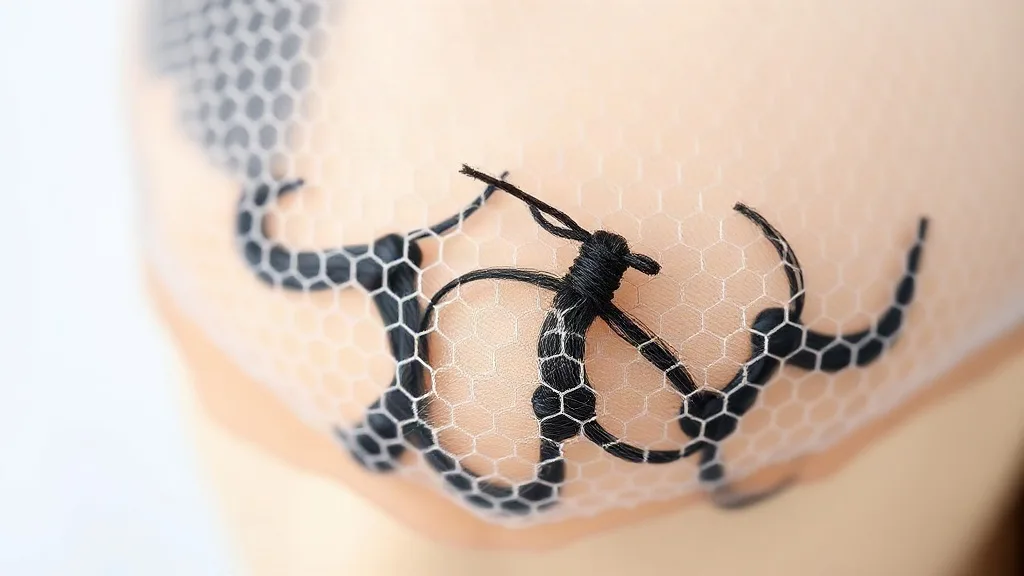

A lace front wig is, mechanically speaking, a composite material. It has a fine knitted mesh substrate, thousands of individually knotted fibre bundles anchored to that mesh, and an interface — adhesive, tape, elastic, or comb — that couples the whole assembly to your scalp. Nearly every complaint a beginner has traces back to one of those three components. The hairline looks fake because of knot density or lace tone. The cap itches because of the base fabric behind the lace. The wig sheds because the knots were over-processed. Once you can read a specification sheet, buying stops being a guessing game.
What follows is the information I wish every first-time buyer had before spending money. It is not a style guide. It is a breakdown of the parts, the numbers attached to them, and which numbers are worth paying for.
What "Lace Front" Actually Means
A lace front wig has a strip of lace running ear to ear along the front of the cap, usually between one and four inches deep. Hair is tied into that lace — by hand, knot by knot — which is what allows you to part the hair anywhere along the strip and expose a hairline that reads as scalp rather than fabric.
Everything behind that strip is normally wefted: rows of machine-sewn hair attached to a sturdier mesh or fabric base. That division matters because the lace panel is the delicate, labour-intensive, expensive portion, while the wefted back is the structural workhorse that gives the cap its shape and durability.
A full lace wig extends that hand-tied lace across the entire cap, which permits multi-directional parting and high ponytails. It also costs substantially more, tears more easily, and demands more careful handling. For a first purchase, a lace front is the better engineering trade-off. You get the majority of the visual benefit at a fraction of the cost and maintenance burden.
The Anatomy of a Lace Front Cap
Before you compare wig to wig, learn the parts. Manufacturers rarely list all of them, but the ones that do are usually the ones worth buying from.
- Lace frontal panel — 1 to 4 inches deep, hand-tied, sits at your natural hairline
- Wefted mid-section — machine-sewn rows that sit beneath your own hair
- Stretch panel or elastic band — allows the cap to conform to the curvature of the skull
- Ear tabs — small fabric tabs that anchor the cap above the ears and stop it riding up
- Nape adjusters — hook-and-loop or hook-and-eye straps that control circumference
- Internal combs or clips — optional attachment points, useful for glueless wear
- Monofilament or silk top — a sheer base that conceals knots on the crown (premium units only)
A common beginner error is obsessing over the lace and ignoring the back of the cap. If the wefts are sewn onto a coarse, heavy mesh, the cap will sit bulky and high on the head no matter how good the hairline is. Ask for the base material and the total cap weight if the vendor publishes it. Under about 200 grams for a mid-length unit is comfortable; much above 300 grams and you will feel it by hour four.
Lace Materials: Swiss, French, HD, and Transparent
Lace is a knitted fabric, and only two variables really govern how invisible it looks: fibre diameter and knot spacing. Everything else is marketing language layered on top of those two numbers.
- Swiss lace — very fine fibres, excellent knot blending, delicate and prone to tearing at stress points
- French lace — slightly thicker and more durable, marginally more visible up close
- HD lace — extremely fine fibres engineered to blend into skin; typically the most fragile and the shortest-lived
- Transparent lace — tinted to suit a range of skin tones, more forgiving than HD and considerably more durable
Here is where beginners get led astray: HD lace is marketed as universally superior. It is not. It is thinner, which means better blending on camera and a materially shorter service life. If you plan to install and remove frequently, or you are still learning, standard transparent lace or a good French lace will outlast HD by a wide margin and cost less.
Lace tone is a separate decision from lace type. Match lace to the skin under your part, not to your facial skin. Human scalp is frequently two to four shades lighter than the forehead because it sees far less sun, and a lace that matches your face will read as a dark band at the part. If you are between tones, go lighter and tint the lace down rather than trying to lighten a dark lace.
Knot Bleaching and the "Scalp" Illusion
Each strand is tied into the lace as a knot, and an untreated knot reads on camera as a small dark dot. Bleaching the knots lightens them so the base of each hair mimics a follicle emerging from skin. The technique works — and it is also the single fastest way to destroy a wig.
- Bleach before the first install, not repeatedly; every cycle weakens the knot
- Use a light hand and short contact time — over-processing causes shedding at the part
- Tint the lace after bleaching to match your scalp
- Never bleach knots on coloured, relaxed, or heavily processed hair — the fibre is already compromised
- If the knots are pre-bleached by the manufacturer, leave them alone
Think of it in terms of tensile strength. A bleached knot loses a meaningful fraction of its mechanical integrity. Do it once, do it gently, and treat the part line as a wear point from then on.
Human Hair vs. Synthetic in a Lace Front
Human hair has a cuticle layer and a moisture regain of roughly 15% by weight in normal humidity. It moves, absorbs product, takes heat, and behaves like the hair on your head — because it is the same material. It also costs three to ten times more and requires moisture management to avoid drying out.
Synthetic fibre — usually modacrylic, sometimes polyester blends — has a moisture regain in the low single digits and no cuticle. That is why it holds a pre-set curl through humidity and also why it cannot be dyed lighter, why it cannot take high heat, and why it often reads as synthetic on camera. The giveaway is specular reflectance: synthetic fibre has a smoother surface and reflects light in a sharper highlight than human hair, which scatters it softly.
There are workarounds. Heat-friendly fibre blends tolerate styling tools up to roughly 300–350°F (150–175°C), depending on the manufacturer. A light dusting of dry shampoo or a mattifying fibre powder knocks down the sheen considerably. But if realism at the part line is your priority, human hair wins on material properties, not marketing.
For a first lace front that you intend to learn on, a mid-range human hair unit or a good heat-friendly synthetic is sensible. Reserve genuine Remy or virgin human hair — where the cuticles are intact and aligned in a single direction, which is what prevents tangling — for your second or third purchase. Beginners damage wigs. Heat, rough detangling, and improvised washing cost more units than bad luck does.
Density, and Why 150% Isn't Automatically Better
Density describes how much hair is tied into the cap, usually expressed as a percentage of an industry baseline. Around 130% reads natural. 150% is the common default. 180% and above is the look you see on social media.
High density photographs beautifully and performs poorly at the hairline. A real hairline is sparse and irregular at its edge — individual hairs, uneven spacing, a graduated fade into the forehead. A 180% density unit typically has a dense, bluntly cut edge that reads as a solid wall of hair. If realism matters, ask specifically about hairline density. Some manufacturers tie the front half-inch 15–30% lighter than the body to create that graduated edge, and that single specification does more for believability than any other.
Density also drives weight and heat retention. A 180% density unit at 22 inches is heavy, warm, and tiring across the temples by the end of a workday. If you live somewhere hot, or your natural hair is fine, 130–150% will be more comfortable and, in most cases, more convincing.
Measuring Your Head
Lace does not stretch. The stretch panel does. That means an undersized cap will not simply settle in — it will lift at the temples and pull at the nape. Measure before you buy, and measure twice.
- Circumference — around the hairline, above the ears, around the back; average is roughly 21.5–22.5 inches
- Front to nape — from the front hairline over the crown to the nape; average roughly 13.5–14.5 inches
- Ear to ear over the top — average roughly 12 inches
- Temple to temple across the forehead — average roughly 13 inches
If you fall between sizes, size up and use the adjusters. A slightly large cap can be tightened; a small cap cannot be loosened, and the tension will make itself known within an hour.
Glueless vs. Adhesive Installations
Glueless installations rely on an elastic band, internal combs, or a pre-attached headband. There is nothing to learn, nothing to damage your hairline, and the wig comes off every night. The trade-off is a hairline that sits slightly less flush and may shift during the day.
Adhesive installations use lace glue or tape on a clean, prepped hairline. They produce the strongest, most realistic result, and they are also the source of most beginner problems. Alcohol-based removers, repeated tension, and daily adhesion cycles are the primary causes of traction damage along the hairline — the exact area you most want to protect.
My recommendation is unambiguous: start glueless for the first month. Learn how the lace behaves when it warms up against your skin, learn where your head shape needs adjustment, and learn your removal routine before adhesives enter the picture.
What It Actually Costs
- Synthetic lace front — roughly $40–$120
- Heat-friendly synthetic — roughly $80–$200
- Human hair blend — roughly $120–$250
- Remy human hair lace front — roughly $200–$600
- Virgin hair with HD lace — roughly $500–$1,500 and up
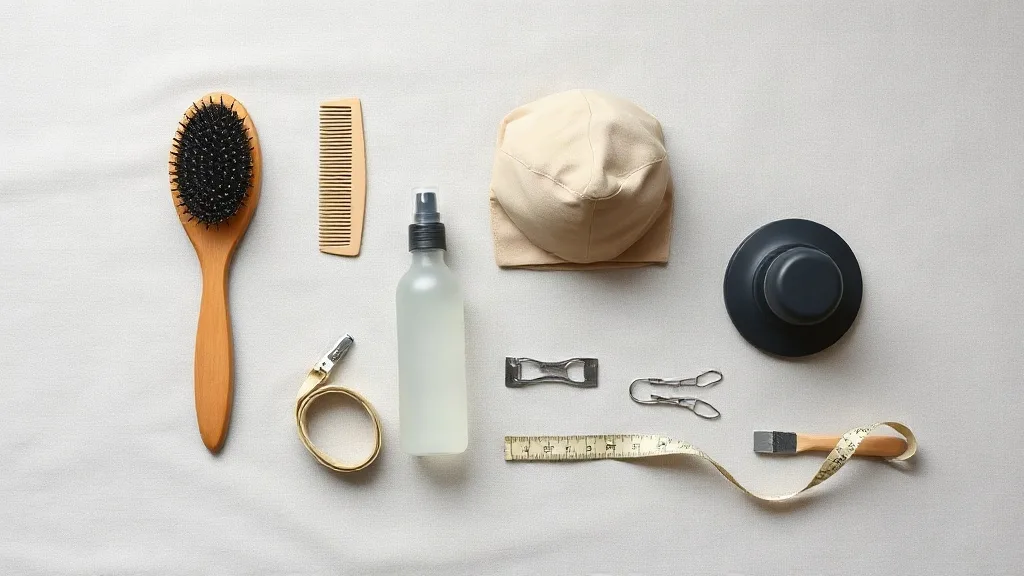
- Care kit (adhesive or tape, tint spray, wig cap, stand, loop brush, sulfate-free shampoo) — roughly $40–$80
The hidden variable is lifespan, so the honest comparison is cost per wear. A $90 synthetic worn three times a week may last two to four months. A $400 human hair unit with proper care and a good stand can last twelve to eighteen months. Divide it out. The expensive wig is frequently the cheaper one.
Care and Realistic Lifespan
- Detangle from ends toward roots using a wide-tooth comb or loop brush
- Wash every 8–15 wears with sulfate-free shampoo in cool water
- Condition mid-lengths to ends only, keeping product off the lace and knots
- Air dry on a stand; never brush lace while wet
- Store on a stand or in a satin bag — friction is the enemy of both fibre and mesh
- Limit heat tools and keep human hair below about 350°F with a protectant
- Rotate between at least two units if you wear daily
Lace fails through mechanical fatigue. Every install and removal cycle applies stress to the same knot points, and the mesh itself abrades against your hairline. This is why a wig worn daily with adhesive lasts noticeably fewer months than the identical wig worn a few times a week. Rotation is not indulgence; it is maintenance strategy.
Beginner Mistakes That Cost Real Money
- Buying HD lace as a first unit and tearing it within weeks
- Guessing cap size instead of measuring
- Over-bleaching knots and creating a shedding part line
- Choosing 180% density and expecting a natural hairline
- Using adhesive before mastering a glueless install
- Judging density from photographs, where lighting changes everything
- Skipping the care kit budget, then improvising with the wrong products
A Buying Checklist
- Lace type and frontal depth (13x4, 13x6, and so on)
- Lace tone matched to your scalp, not your face
- Cap size based on four actual measurements
- Hairline density specified, ideally lighter than the body density
- Hair origin and cuticle direction — Remy means aligned cuticles, which means less tangling
- Base material and cap weight, if published
- Return policy — most vendors accept untouched units with tags attached
- Budget set aside for adhesive, tint, stand, and brushes
None of this is complicated once it is laid out as specifications. A lace front wig is a set of measurable properties: lace fibre diameter, knot treatment, base material, density gradient, cap dimensions, and fibre type. Read those six things and you will make a better decision than ninety percent of first-time buyers — and you will spend your money on the properties you can actually see at the hairline, rather than the ones printed largest on the packaging.