

Here is the thing I have learned after fitting more lace fronts than I can count, often on people who have ninety seconds before they walk out the door: nobody gets clocked because of the wig. They get clocked because of the hairline. The hair itself almost always passes. It is the front edge that gives the game away — a hard line, a shiny strip of lace, dark knots, a hairline sitting a half inch too low.
I specialize in speed wigs. I have built a career around getting a wig on a head in seconds and looking like it grew there. What I found is that the fast method and the undetectable method are the same method, once you strip away the ceremony. Most of what makes a lace front look real happens in about four minutes of work. The rest is technique you only have to learn once.
What Undetectable Actually Means
Undetectable is not one quality. It is four separate checkpoints, and a person looking at your hairline will read them in this order. Fail one and their eye snags, even if they cannot say why.
- The edge: the transition from your forehead to the lace. If there is a visible line, a ridge, or a shine, you are done.
- The knots: the tiny dots where hair is tied into the lace. Dark, unbleached knots read as a grid of dots.
- The shape: your natural hairline is irregular. A perfectly straight or overly rounded lace edge looks like a mask.
- The blend: how the wig hair transitions into your own baby hairs, sideburns, and skin tone at the temples.
Three of those four can be corrected in under a minute each. The fourth, the edge, is where you spend your real effort, and it is the one that pays off.
The Seven-Second Audit: What People Notice First
Before you fix anything, run this mental checklist on yourself in a mirror under harsh light — bathroom lighting, not bedroom lighting. In order of how quickly a stranger will spot it:
- A visible ridge where the lace ends on your forehead. This is the number one tell.
- Shine. Real scalps are matte. Lace with no powder or tint catches light like plastic wrap.
- A visible lace grid. Lace that is too dark, too coarse, or too thick against your skin shows its weave pattern.
- Dark, unbleached knots along the part or hairline.
- A density cliff: baby hairs that go from paper-thin to full thickness in a straight line.
- A hairline placed too low or shaped too evenly — a straight, hard horizontal edge across the forehead.
- White adhesive residue, or glue that has gone tacky and shiny along the edge.
Fix them in that order. Most people try to fix the knots and the density first, when the ridge and the shine are what everyone actually sees.
Step 1: Fit First, Lace Second
Eighty percent of visible lace problems are cap problems. If the cap is too big, the front edge lifts when you raise your eyebrows. It it is too small, the lace pulls tight and the hairline sits too high or too far back. If it sits wrong front to back, the lace lands on the wrong part of your forehead, and no glue on earth will fix that.
Before you touch adhesive, put the wig on bare-headed and check this in thirty seconds:
- The front edge sits where your natural hairline sits — roughly four fingers above your eyebrows, slightly irregular, not straight.
- The ear tabs line up with the top of your ears, not in front of or behind them.
- The cap does not lift when you open your mouth wide or raise your brows.
- The back sits at your natural nape hairline, not riding up.
Adjust the straps, add a nylon wig grip band if the cap creeps, and only then move on. A cap that moves is a hairline that fails, and no amount of product will out-argue physics.
Step 2: Prep Your Hairline in Sixty Seconds
Adhesive sticks to clean, dry, oil-free skin — full stop. Anything on your forehead is working against you, and this is where most people lose their grip by mid-afternoon.
- Skip conditioner, serum, and moisturizer within two inches of your hairline on the day you are applying.
- Wipe the forehead and temples with a clarifying wipe or alcohol pad. Let it dry completely — about twenty seconds.
- Do not apply primer or heavy skincare under the lace. It creates slip.
- If you have oily skin, a light dusting of translucent powder before adhesive gives you hours more wear.
That is the whole step. Sixty seconds, and it doubles how long the install lasts.
Step 3: Cut the Lace Like You Mean It
This is where good wigs get ruined. The instinct is to cut the lace as close to the hair as possible. Do not. Leave one to two millimeters of lace beyond the hairline. That tiny margin is what softens the edge and gives you something for powder and tint to grab.
- Cut in small snips with sharp, small scissors — nail scissors or embroidery shears. Never one long, confident slice.
- Follow the curve of the hairline, including around the ears and temples. Straight-line cutting is the fastest way to a visible edge.
- Cut a gentle zigzag rather than a straight edge where the lace meets your forehead. Irregular is realistic; razor-straight is not.
- Never cut into the knots themselves. Once a knot is severed, the hair sheds and you have a bald patch at your hairline.
If you are unsure, cut less than you think you need, put it on, and look. You can always take more off. You cannot put it back.
Step 4: Pick Your Attachment Method by Time Budget
There is no single best adhesive. There is the best one for how long you need it to hold and how much time you have right now. Here is the honest ranking.
- Wig tape: sixty to ninety seconds to apply. Perfect for a day, a meeting, a night out, or a wig you rotate daily. Lowest hold, easiest removal, least residue.
- Styling gel or spritz (the strong-hold hairspray method): about two minutes. Great for a quick daily install that stays until you sweat heavily. Not for swimming or humidity.
- Silicone-based lace adhesive: twenty to forty minutes of dry time, but three to five days of hold, and it stays slightly flexible so it moves with your face.
- Acrylic or rubber-based long-wear glue: the strongest and most waterproof, but the longest dry time, the harshest removal, and the most damaging to your own hairline if you rush it.
For daily wearers, I recommend tape or spritz most days and a proper adhesive install for events. Rotating methods gives your natural hairline a break, and a healthy hairline is a big part of looking undetectable.
Step 5: Melt the Lace — The Step Everyone Skips
Melting is just a fancy word for making the lace take on your skin tone so it stops reading as fabric. Lace that has not been melted looks like lace. Lace that has been melted looks like scalp. There is no shortcut past this step, but it only takes a couple of minutes.
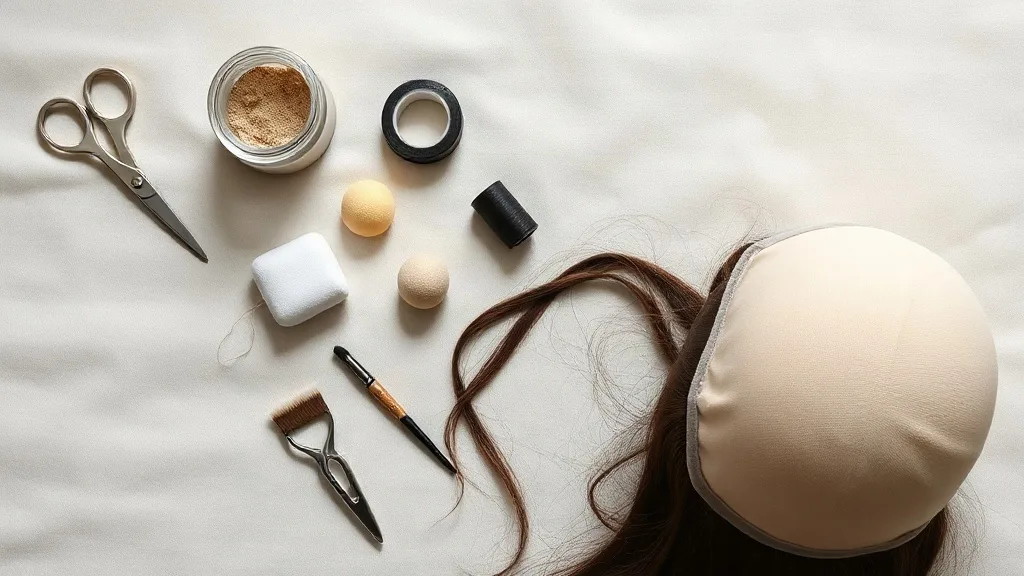
- A tinted setting powder that matches your scalp — not your face makeup, your scalp.
- A dense powder brush, or a makeup sponge for pressing product into the lace edge.
- A lace melt spray or a light hold spray, applied from a distance and pressed, never soaked.
- A fine-tooth comb or an edge brush for laying the front hairs down after melting.
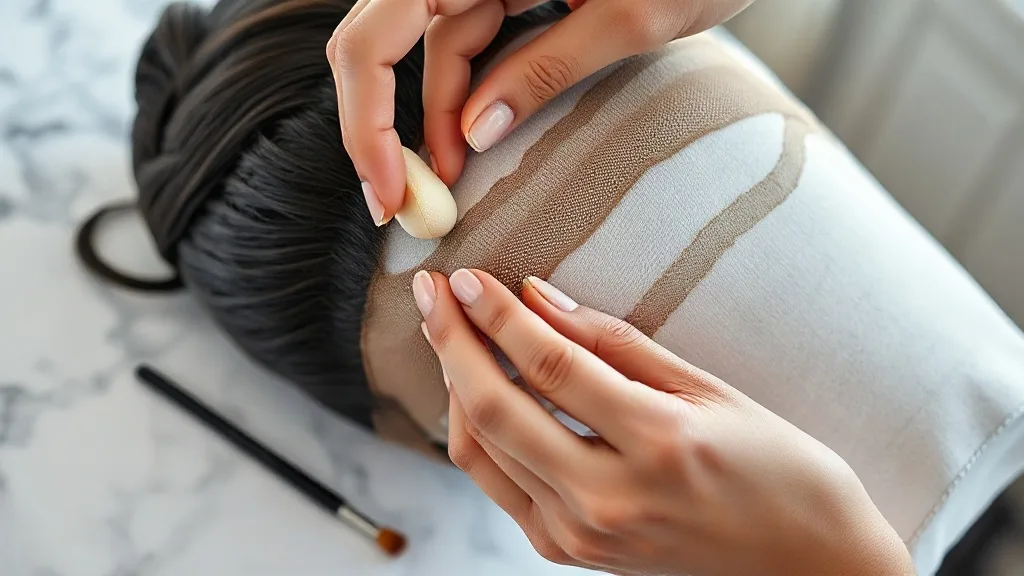
The technique: press the lace down onto your skin so it conforms, then powder through the lace with a sponge, and gently diffuse a light mist over the top. Press again with a clean cloth or your fingers. Do not over-powder — too much and the lace goes chalky and starts showing a white cast, which is worse than the original problem. Build in thin layers.
If you can still see the grid of the lace after two thin layers, the problem is not powder. It is that your lace is too dark or too coarse for your skin tone, and it is time to switch to a lighter, finer lace.
Step 6: Hairline Density, Baby Hairs, and the Part
A real hairline is not uniform. It is thinner at the very front, denser a centimeter back, and it is irregular — sparse in one spot, slightly thicker in the next. A wig hairline that runs at full density all the way to the edge is the second most common giveaway after the ridge.
The fix is plucking, and you do not need much. With tweezers, thin out a small strip along the front edge, working in good light and always checking against a mirror from a distance. The instinct is to over-pluck. Do not. You want a soft, gradual thinning, not a bald strip. Take a few hairs, look, take a few more.
On baby hairs: only lay them if you actually have them naturally. If you are someone whose hairline is clean with no wispy edges, a curled spray of baby hairs reads as costume. Match your reality. And on the part, pluck it slightly wider than feels natural — real parts are a little ragged, not a clean razor line. Use a fine-tipped tool or the end of a tail comb to widen the parting space by a couple of millimeters.
Step 7: Knots, Tint, and Color Matching
Knots are the small dark dots at the base of every hair. On a lace front, they are most visible at the part and the hairline, and they are the reason a wig can look like a wig from six inches away.
- Bleached knots: the standard fix. Knots are lightened so they blend with the scalp. Works beautifully on dark hair, but over-bleaching damages the knot and causes shedding — a light, controlled bleach is better than a strong one.
- Tinted lace: use a tinted spray or a light dusting of powder matched to your scalp, not to your foundation. This is what kills the visible grid.
- Lace color: pick lace that matches your scalp tone. Transparent and HD lace disappear on most light-to-medium complexions; medium brown lace suits deeper skin tones. Matching the lace to your face makeup instead of your scalp is a classic error.
- Scalp concealer: a tinted scalp powder or a light spray in your part area makes the lace look like skin rather than a fabric panel.
One warning: everything you put on the lace has to match your scalp in daylight. Check yourself by a window before you leave. Indoor bathroom lighting hides a world of sins and creates them too.
My Ten-Minute Speed Routine
This is the sequence I use when someone has ten minutes and wants to walk out looking like they were born with it. The order matters more than the speed.
- Minute zero to one: wipe the hairline clean, dry it, dust with translucent powder if you are oily.
- Minute one to three: fit and adjust the cap, strap it, and check the hairline placement in a mirror.
- Minute three to four: cut or trim the lace edge if needed — small snips, one to two millimeters of margin.
- Minute four to six: apply tape or spritz along the front edge and lace it down, pressing from the center outward toward the temples.
- Minute six to eight: melt. Powder through the lace with a sponge, mist lightly, press again.
- Minute eight to nine: lay the front hairs with an edge brush or comb, and set the part.
- Minute nine to ten: final check in daylight or by a window. Fix anything shiny, ridged, or too uniform.
Ten minutes, done properly, beats forty-five minutes of fussing. The trick is not to rush the melt and not to skip the fit check. Those two steps are the whole game.
Maintenance Habits That Keep You Undetectable
An undetectable install is not a one-time achievement. It is a habit. These are the things that keep a lace front looking real week after week.
- Remove adhesive residue fully before each reinstall. Built-up glue creates a ridge, and a ridge is the first thing anyone sees.
- Give your natural hairline a break — at least one or two days a week without adhesive. A stressed hairline thins, and thin edges are hard to hide.
- Wash the unit every six to ten wears depending on how much product you use, and always condition mid-lengths and ends, not the lace.
- Store the wig on a stand or a mannequin head, not in a bag. Crushed lace does not lie flat, and wrinkled lace shows.
- Refresh the part and re-melt every few wears. Powder fades, and lace that was invisible on Monday can be visible by Friday.
- Rotate between two or three units so no single lace front takes all the wear.
Five Mistakes That Blow Your Cover
- Cutting the lace flush to the hair. No margin, no melting, no forgiveness.
- Skipping powder or tint because the lace looked fine indoors. It never looks fine in daylight without tint.
- Over-plucking the hairline in one sitting. You cannot un-pluck, and sparse edges are more obvious than dense ones.
- Placing the hairline too low on the forehead because it feels more secure. It reads as a hat, not hair.
- Wearing a glossy foundation or heavy moisturizer under the lace. It destroys adhesion and creates shine along the edge.
Quick Answers
How long should a lace front install last? With tape or spritz, a day. With a silicone-based adhesive, three to five days with light touch-ups. Anything longer than a week without removal is asking for a damaged hairline and a lifted, visible edge.
Do I have to bleach the knots? Not always. Bleached knots help most on dark hair with a visible part. If your lace is fine and your hair is light, tinted lace and a good melt can be enough. Never over-bleach — shedding at the hairline is worse than a slightly visible knot.
Is HD lace worth it? If your priority is the most invisible hairline possible and you have a light-to-medium scalp tone, yes. HD lace is finer and thinner, which means it melts faster and shows less. It is also more delicate, so handle it carefully and expect a shorter lifespan.
What if my hairline still shows after all of this? Nine times out of ten, the answer is the lace color. If your lace is darker or warmer than your scalp, no powder will fully hide it. Fix the lace match before you change anything else.
The Bottom Line
Making a lace front undetectable is not about buying the most expensive unit or spending an hour in front of a mirror. It is about four things: a cap that fits, a hairline placed correctly, a lace edge that has been tinted and melted, and a density that is a little irregular. Nail those and you can apply in ten minutes and walk out looking like you never touched a wig at all.
Speed and realism are not opposites. They are the same skill, done efficiently. Learn the order, practice the melt, and stop overworking the lace. The hairline you do not have to think about is the one that looks real.