Why Bother Cutting a Wig Yourself?
Let's be real: taking a wig to a stylist costs time and money. And if you're like me (Emma here, your friendly neighborhood wig-addict), you've probably impulse-bought a wig that looked perfect online but arrived looking like a helmet. Short wigs are especially tricky—too long and you're swimming in hair, too short and you look like you lost a fight with a lawnmower. I've been there. I've cried over it. But I've also learned that cutting a short wig at home is totally doable if you're patient, use the right tools, and embrace the occasional mistake. Today I'm going to break down the steps I use on my own wigs (yes, the ones you see on Instagram) so you can get a custom look without the sticker shock.
What You'll Need (Don't Skip This)
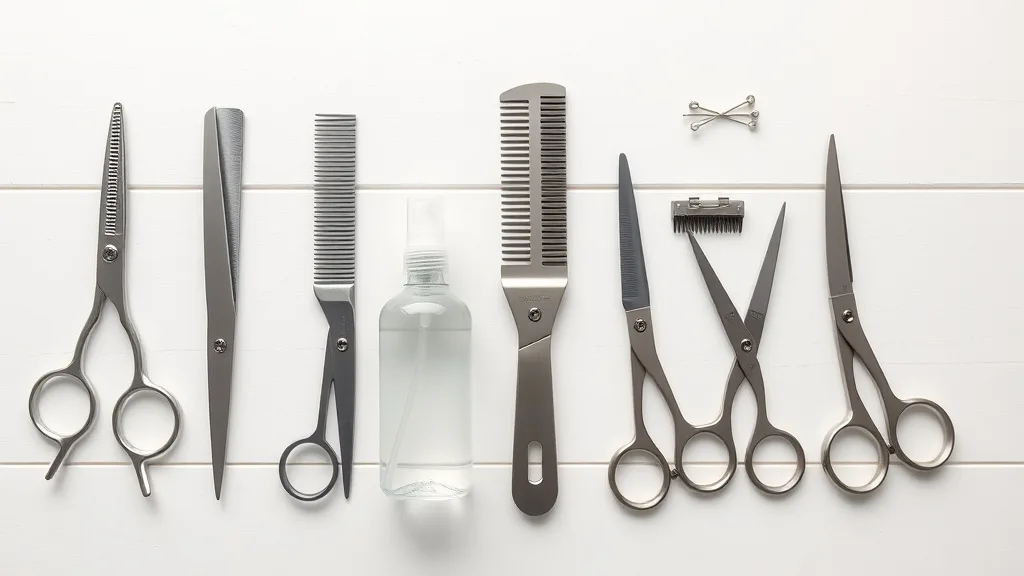
First, let's talk tools. You can't just grab kitchen scissors and go to town—I promise you that only ends in tears. Here's my starter kit:
- Sharp hair-cutting shears (blunt or curved—I prefer 6.5-inch)
- Fine-tooth comb and a wide-tooth comb
- Sectioning clips or snap clips
- A wig head (canvas or styrofoam) that's the same size as your head
- Spray bottle with water
- Thinning shears (optional but recommended)
- Hairpins to mark your cut line
I get my shears from a beauty supply store—don't cheap out. A good pair costs around $30-$40 and will save you from jagged ends. Also, buy a separate pair of thinning shears; they're worth every penny for short wigs.
Step 1: Prepare Your Wig
Before you make even a single snip, you need a clean, dry, and detangled wig. Wash it if necessary, then let it air dry or use a low-heat blow dryer (check the fiber type—synthetic hates high heat!). Once dry, gently comb out any tangles starting from the ends. Then pin the wig onto your wig head, making sure it fits snugly. I like to use T-pins at the temples and nape to hold it in place.
Spritz the hair lightly with water so it's slightly damp. This helps you cut more accurately, and the hair doesn't fly everywhere. Plus, damp hair shows the texture better.
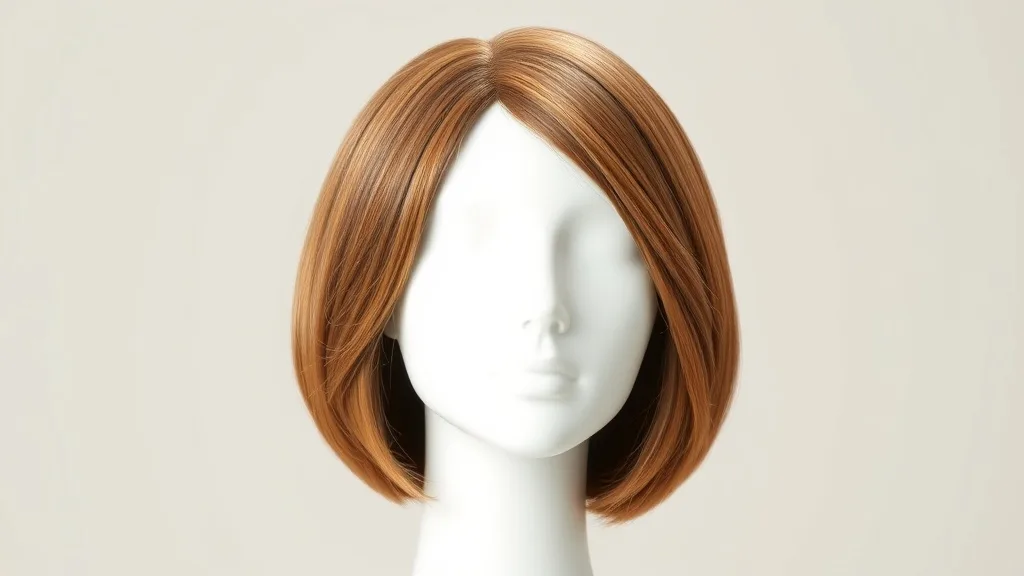
Step 2: Decide on Your Length
This is the part where most people mess up. Instead of going straight for the cut, pull up a reference picture of your desired short style. A chin-length bob? A pixie with wispy bangs? A tapered cut? Hold the image up next to the wig and compare. Then, using hairpins, mark where you want the final length to fall. I like to start a little longer than my goal—because you can always cut more, but you can't glue hair back.
Also: if your wig has a part, decide now if you're keeping it or switching it. Short wigs often look better with a deep side part or no part at all. Use your comb to set the part and pin it in place.
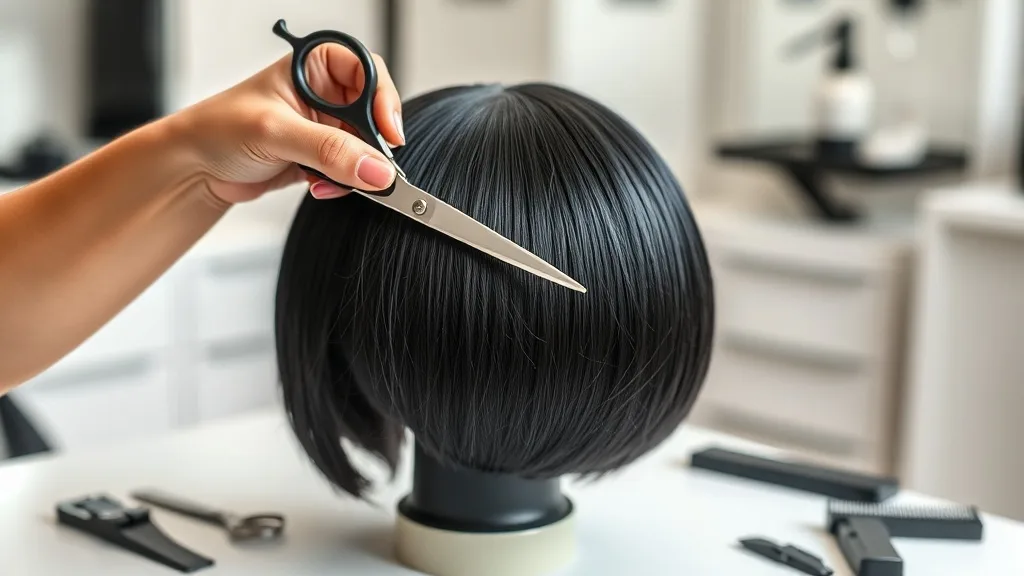
Step 3: The Big Cut (Slow and Steady)
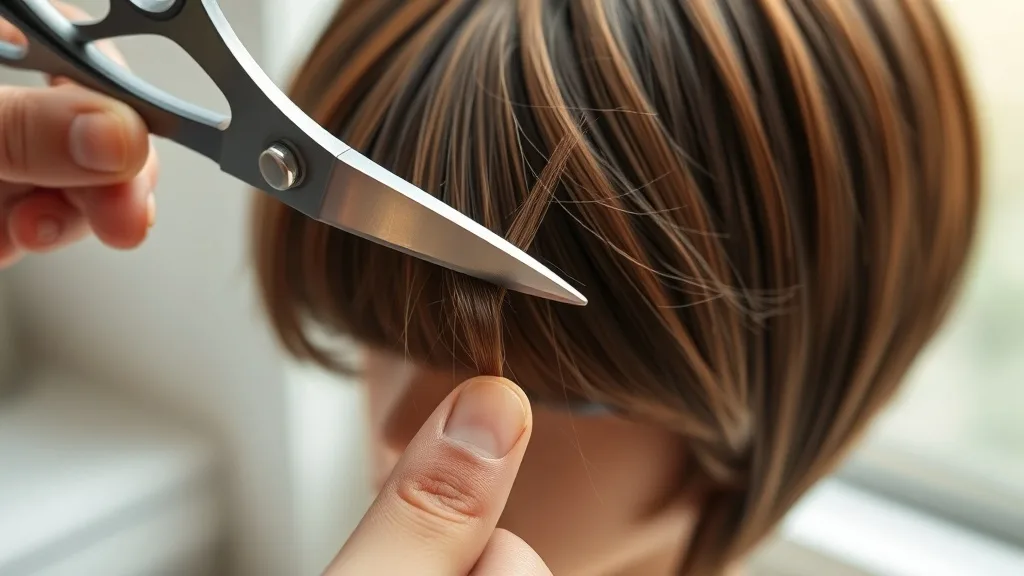
Okay, deep breath. Pick up your shears. Start at the back section, because you can hide mistakes there. Use comb to lift a 1-inch section straight up (perpendicular to the head). Hold the hair between your fingers and slide your fingers down to the length you want. Then, point-cut into the ends—meaning you hold the scissors vertically and make small upward snips. This creates soft, blended ends instead of a harsh line. Work your way from the nape to the crown, section by section.
For the sides, use the same technique but pull the hair forward at a 45-degree angle. When you get to the front (bangs or fringe), go extra slow. I like to cut bangs when the hair is dry so I can see how they fall. If your wig has a closure or lace front, be careful not to cut into the lace—only cut the hair.
Step 4: Texturize and Thin (This Is Magic)
Short wigs can look blocky if they're too dense. That's where thinning shears come in. Swap your regular shears for thinning shears and go over the ends again, starting about an inch from the tips. Don't overdo it; just 3-4 snips per section. This removes weight and helps the hair lay flatter. You can also use the thinning shears to create soft layers—just point-cut into the mid-lengths.
If you don't have thinning shears, you can use the tip of your regular shears to chop into the hair vertically. Same effect, but go easy.
Step 5: The Reveal (And How to Fix Oopses)
Take the wig off the head, shake it out, and put it on your own head. Look in the mirror. Don't panic. If the length is uneven, you can go back and even it out using the same point-cutting method. If you cut too short in one spot, you can try to blend it by texturizing the surrounding hair. And if you really messed up? Well, that's why we have headbands, hats, and accessories. Or you can call it a 'shag cut' and own it.
Pro tip: Use a razor comb (a comb with a built-in blade) to soften harsh lines. But only on human hair wigs—synthetic will fray.
Final Thoughts: Embrace the Mess
Cutting a short wig at home is a skill, and like all skills, it takes practice. My first few wigs looked... questionable. But now I get compliments on my 'salon' cuts all the time. The best part? If I get bored, I can just buy another wig and start over. So grab your shears, put on your favorite playlist, and give it a try. You've got this.