


Over the years, I've seen countless customers struggle with wig fit, especially those with what I call a 'tight hairline' — where the natural hairline is low or the scalp feels sensitive. The secret to a flawless, natural-looking wig isn't just the style; it's the measurement. Get this right, and your wig will feel like it's part of you. Let me walk you through the process.
Why Accurate Measurement Matters
A wig that's too loose will shift, revealing your secret. One that's too tight causes headaches and discomfort. For tight hairlines, precision is even more critical. A proper measurement ensures the wig sits exactly where it should, blending seamlessly with your natural hairline. I've perfected this method over 20 years, and it never fails.
Tools You'll Need
- A flexible measuring tape (cloth or soft plastic)
- A mirror or a helper
- Your current wig or a reference photo (optional)
- Hair clips to hold your hair back
- A notepad and pen to record measurements
Before starting, pull your hair away from your face and secure it. This gives you a clear view of your natural hairline.
Step 1: Measure the Circumference
Place the tape measure around your head, starting at the front of your hairline (where you want the wig to sit). Go behind your ears and around the nape of your neck, then back to the front. Keep the tape snug but not tight. Record this number. This is the most important measurement for a secure fit.
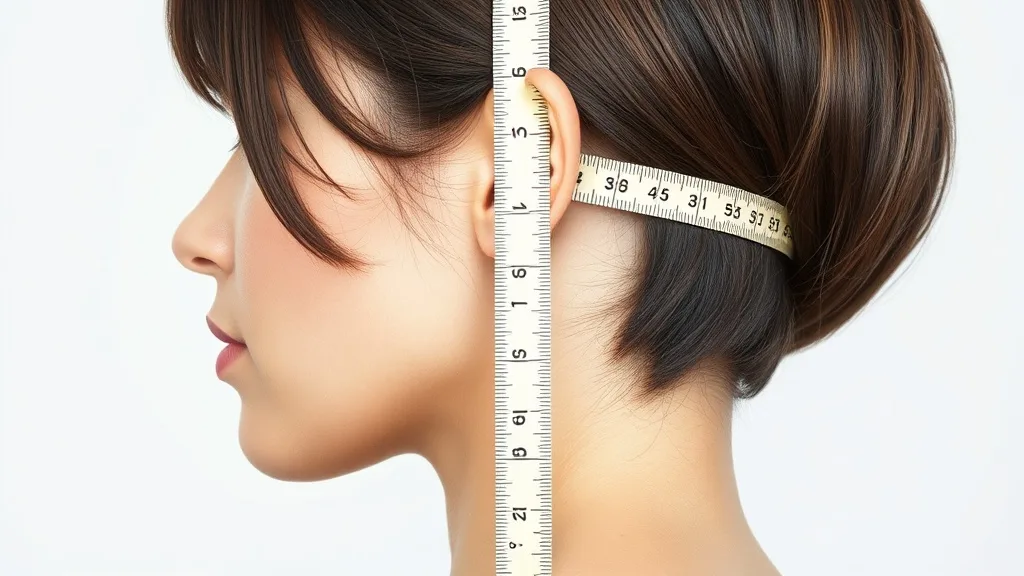
Step 2: Front to Nape
Measure from the center of your front hairline, over the top of your head, to the nape of your neck at the base of your skull. This ensures the wig covers your head from front to back without riding up.
Step 3: Ear to Ear Across Forehead
Place the tape at the front of one ear, follow your natural hairline across your forehead, and stop at the front of the other ear. This measurement is critical for tight hairlines because it determines how the wig frames your face.
Step 4: Temple to Temple Over Top
Measure from the temple area on one side, over the crown of your head, to the temple on the other side. This captures the width of your head at the crown, where many wigs feel tight.
Step 5: Nape of Neck
Measure the width of your nape from the base of one ear to the base of the other, following the natural hairline. This ensures the wig’s nape area conforms to your neck without gaping.
Step 6: Tight Hairline Adjustments
If you have a tight hairline, consider these tweaks: First, add an extra half-inch to the front-to-nape measurement to prevent the wig from pulling. Second, adjust the ear-to-ear forehead measurement to be slightly looser if you experience discomfort. Finally, choose a wig with adjustable straps or a velvet-lined band for a custom fit. I always tell my clients: 'A little extra room at the front makes a world of difference.'
Tips from Roy
- Always measure twice — consistency is key.
- If you're between sizes, go with the larger size and use the adjustable straps.
- For tight hairlines, avoid wigs with thick lace fronts; opt for a monofilament top that can be customized.
- Don't forget to account for your natural hair if you plan to wear a wig cap underneath.
These steps might seem simple, but they're the foundation of a perfect wig fit. I've seen too many people skip the measuring and end up frustrated. Trust me, this little investment of time pays off in comfort and confidence.
Conclusion
Now you have the secrets to measuring for a wig with a tight hairline. Your wig should feel like a second skin — secure, comfortable, and invisible. If you have any questions, visit Wigplace and ask for me. I'm always happy to help.